Contents 7
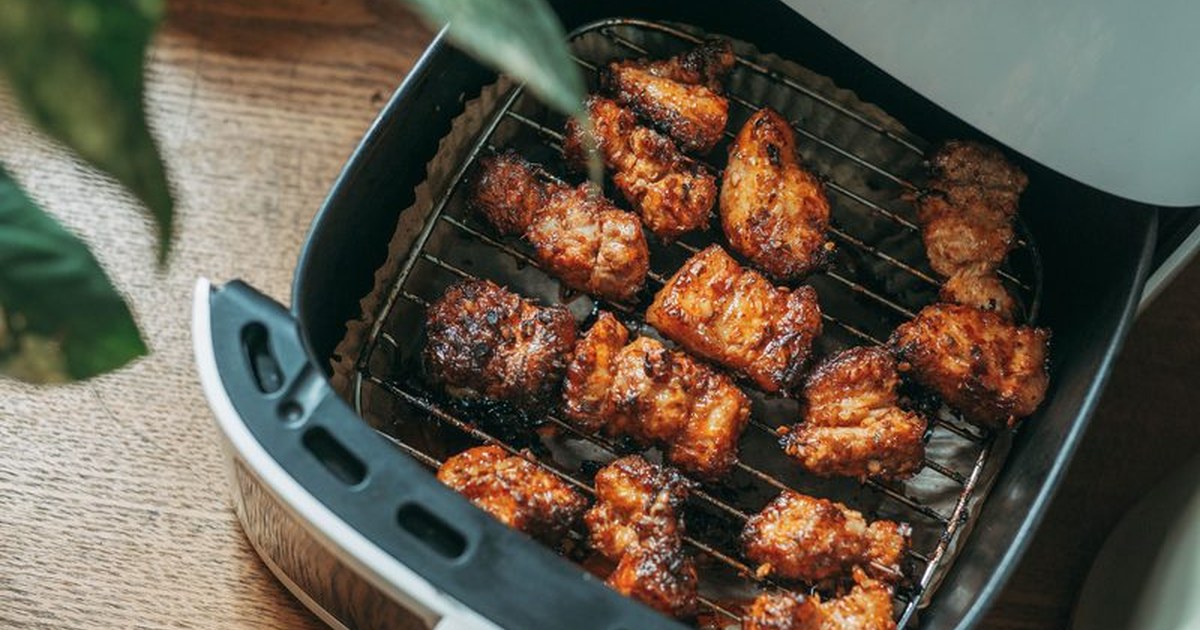
The thigh is one of the cuts that gets along best with the air fryer. It has more fat than the breast, so it handles heat better and comes out juicy inside without you having to watch that it doesn't dry out. And the skin, when you work it right, gets truly crispy. I make this almost every week: it's one of those recipes that feels like Sunday dinner and comes together in no time.
That said, I'm warning you right away about something important: the times and temperatures I give are approximate. They depend on your air fryer model (not all heat the same or have the same basket), how many pieces you put in and the thickness of each thigh. What works in my kitchen may need two or three more minutes in yours. That's why it's best to start at the low end of the range and check.
Ingredients (serves 4)
- 8 bone-in, skin-on chicken thighs (ideally of similar size, so they cook evenly)
- 2 tablespoons of extra virgin olive oil
- 1 teaspoon of sweet paprika
- 1 teaspoon of garlic powder
- 1 teaspoon of dried thyme or rosemary
- Salt and black pepper to taste
- Optional: a few drops of lemon before serving
You don't need breadcrumbs or any breading. The secret to the crunch is in the skin and in drying it well before cooking. If you like a smoky touch, swap the sweet paprika for smoked; if you prefer something spicier, a pinch of cayenne never hurts.
How I prepare it, step by step
1. Dry the skin. This is the step most people skip and the one you notice most. I take the thighs out of the fridge, pat them with paper towel and leave them nice and dry on the outside. If the skin is wet, it won't crisp: it steams.
2. Season. In a bowl I mix the oil with the paprika, garlic powder, thyme, salt and pepper. I rub the thighs all over, under the skin too if I can, taking care not to tear it. I let them rest about 15-20 minutes at room temperature. If you have more time, better in the fridge, and take them out a while before cooking.
3. Preheat. I preheat the air fryer for about 3-5 minutes at 180 °C (350 °F). Not all air fryers have a preheat setting as such; if yours doesn't, run it empty for a few minutes. The starting heat changes the result a lot.
4. First batch, skin side up. I place the thighs in the basket without piling them up, skin side up and with a little gap between them. If they're big or there are a lot, it's better to do two batches: the air has to circulate. I cook at 180 °C (350 °F) for about 20 minutes.
5. Flip and turn up the heat. Halfway through cooking, around 10-12 minutes, I flip them with tongs and place them skin side up again. Then I raise it to 200 °C (400 °F) for another 8-12 minutes so the skin browns and crisps. This is where you need to keep watch: every air fryer browns at its own pace, and in the last few minutes it goes from crispy to burnt easily.
6. Check and rest. I poke the thickest part, next to the bone. If the juices run clear and the skin is golden, they're done. I take them out and let them sit 5 minutes on a rack or a plate, lightly covered with paper towel, so the juices redistribute. If you cut into them right out of the air fryer, the juice escapes and they end up drier.
In total we're talking about 30-35 approximate minutes for normal-sized thighs. If they're very thick, add minutes in the 180 °C (350 °F) phase, not the 200 °C (400 °F) one, so you don't burn the skin before the centre is cooked.
Cook's tips
- Pieces of the same size. If you mix large and small thighs, the small ones overcook. Better to separate them by size and cook in batches.
- Don't fill the basket. A single layer, no piles. The hot air has to pass between the pieces; if they're packed in, they steam and don't crisp.
- Skin always up to start. That way the fat melts and bastes the meat while the top browns.
- Salt at the end, if you like maximum crunch. A pinch of coarse salt right as they come out gives them a great finish. If you salt earlier, the skin releases water and is harder to brown.
- Rack or wire rack. If your air fryer comes with a rack for the basket, use it: the thigh doesn't sit in the juices it releases and the underside browns too.
- Lemon at the end. A few drops of freshly squeezed lemon over the top, once on the plate, lift the flavour a lot without masking the chicken.
Common mistakes
- Wet skin. I've said it already, but I'll insist: drying it well is half the crunch. And don't prick it with a fork, because the fat escapes.
- Putting too many in at once. It's the most common mistake. If you're in a hurry, do two batches back to back: the second comes out just as good because the air fryer is already hot.
- Cooking only at high temperature. If we start at 200 °C (400 °F), the skin toasts outside and the centre stays raw. The sequence 180 °C (350 °F) and then 200 °C (400 °F) works better.
- Opening the basket all the time. Every time you open it, the temperature drops and the chicken takes longer. Look through the window if yours has one, and if not, open only to flip.
- Cutting while hot. Let them rest those five minutes. It makes a huge difference to juiciness.
What to serve with it
With some air fryer potatoes, a green salad and a bit of bread, you have a well-rounded meal. If you have leftover chicken, shredded cold it's delicious in a salad or a sandwich the next day.
Note
The times and temperatures in this article are approximate and depend on the air fryer model, the number of pieces and their thickness. Start at the low end of the range, check for doneness and adjust to your appliance. I don't include nutritional or calorie data because I don't have a public source I can cite here; if you need it, check an official source. For any food safety questions about chicken, follow the recommendations of an official consumer or food safety agency in your country.